
How to Use Coucal: A Step-by-Step Guide
Welcome to our comprehensive guide on using our product to streamline your recruitment process. This tutorial will walk you through each step, from signing up to managing candidates, ensuring you make the most of our features. Let's get started!
1. Sign Up and Create a Company Profile
To begin using our application, follow these steps:• Login: Access the application using your company's official email address. Please note that public email domains (e.g., Gmail, Yahoo) are not supported for creating a company profile.
• Create Company: Once logged in, use your company credentials to set up your company profile. This ensures all activities are accurately attributed to your organization.
2. Create a Job
After successfully signing up, you're ready to create job listings. Here's how: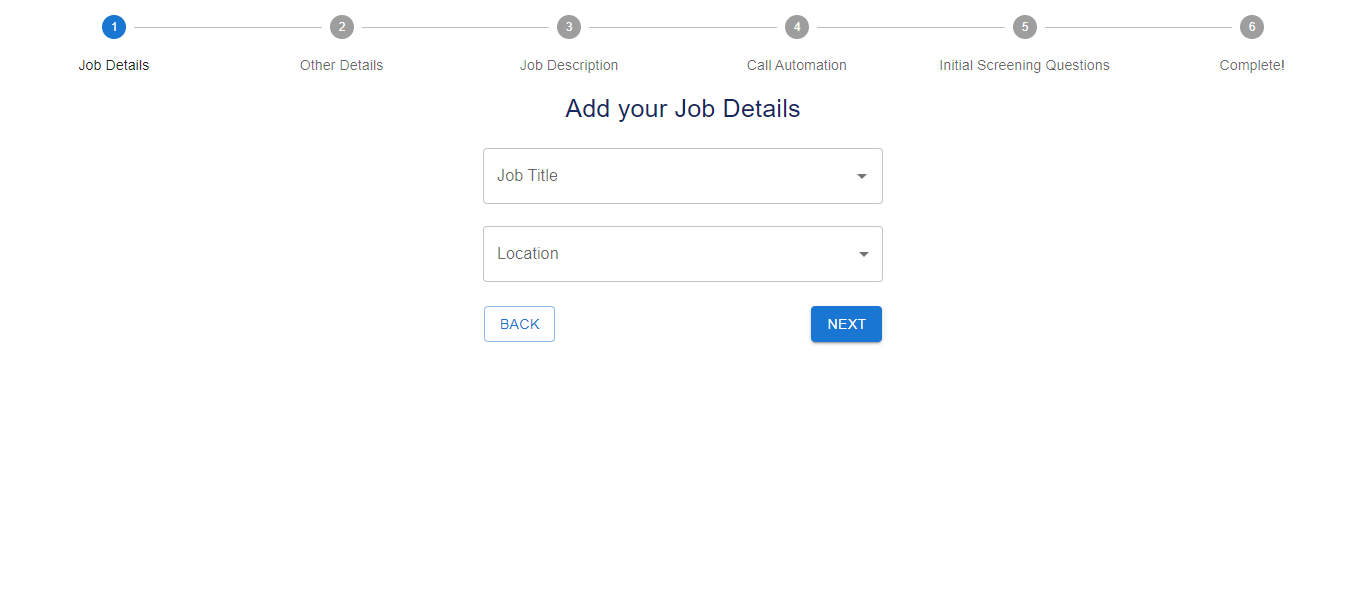
• Job Details: Provide a thorough overview of the job, including the job title, location (Remote, Onsite, or Field-based), employment type (Part-time, Full-time, or Consultant), and a clear salary range specifying both minimum and maximum compensation.
1. Job Title: Enter the job title like Software Engineer, Full Stack Developer etc.
2. Job location: Specify whether the position is Office, Remote, or Infield.
3. Job Type: Indicate if the role is full-time, part-time, or remote.
4. Salary Range: Set the minimum and maximum salary expectations.
5. Enable Features: Choose from options like screening calls, technical interviews, or coding assessments.
3. View and Manage Jobs
Once a job is created, you can manage it through the dashboard: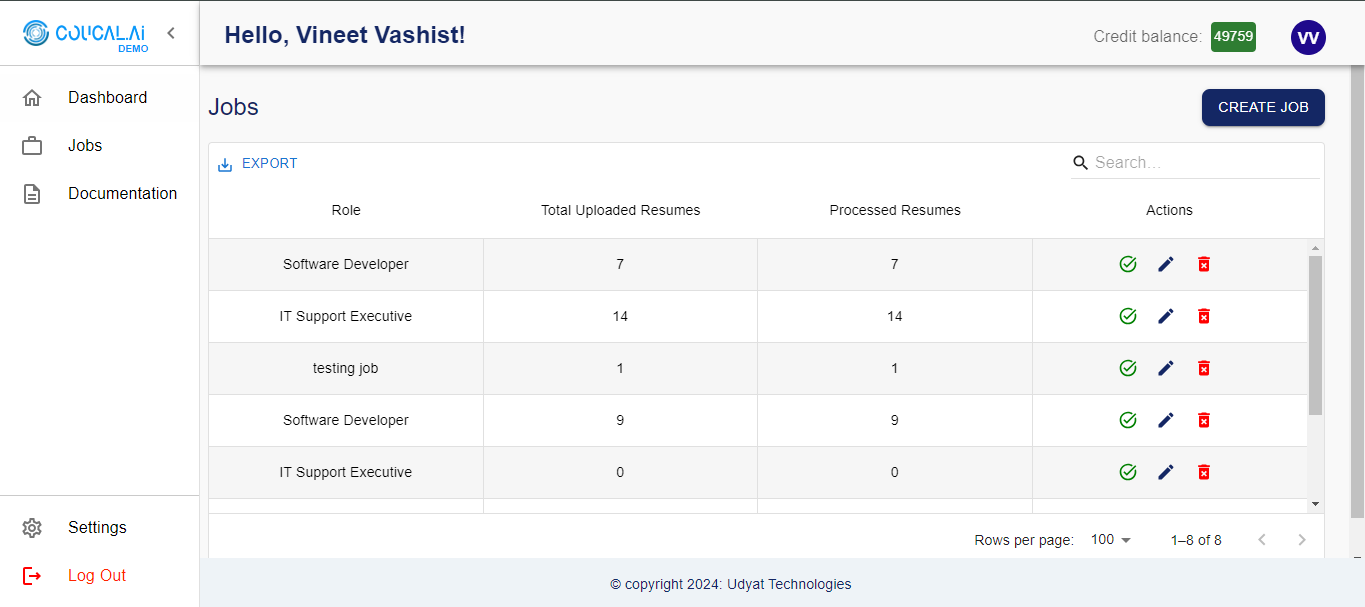
• Dashboard Overview: View the number of jobs created and track the status of uploaded and processed resumes.
• Job Details: Access detailed information about each job, including candidate progress and job status.
4. Upload Resumes:
To evaluate candidates, you'll need to upload their resumes: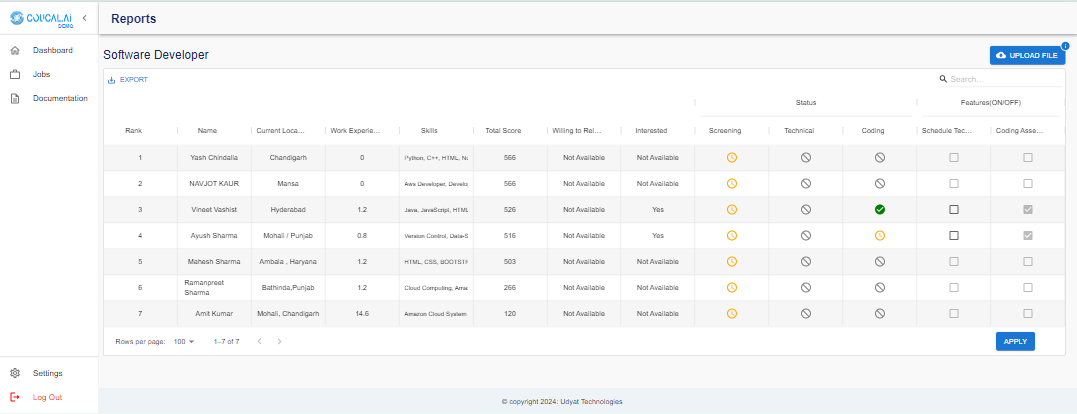
• Upload Files: Navigate to the reports page and click on "Upload File." Ensure your resumes are in a valid ZIP file containing PDF, DOC, or DOCX formats. The ZIP file should not exceed 50 MB.
• Processing: Within a few seconds, the resumes will be processed and displayed in the table according to their ranking, making it easy to shortlist candidates.
5. Schedule Interviews:
With resumes shortlisted, you can proceed to the interview phase:• Schedule Rounds: Select the candidates you're interested in and schedule technical , coding rounds and aptitude rounds. Use the checkboxes to organize interviews.
• Track Progress: Monitor the status of each candidate's interview rounds—whether they are completed, pending, or scheduled.
6. View Resume Insights:
For a deeper understanding of each candidate: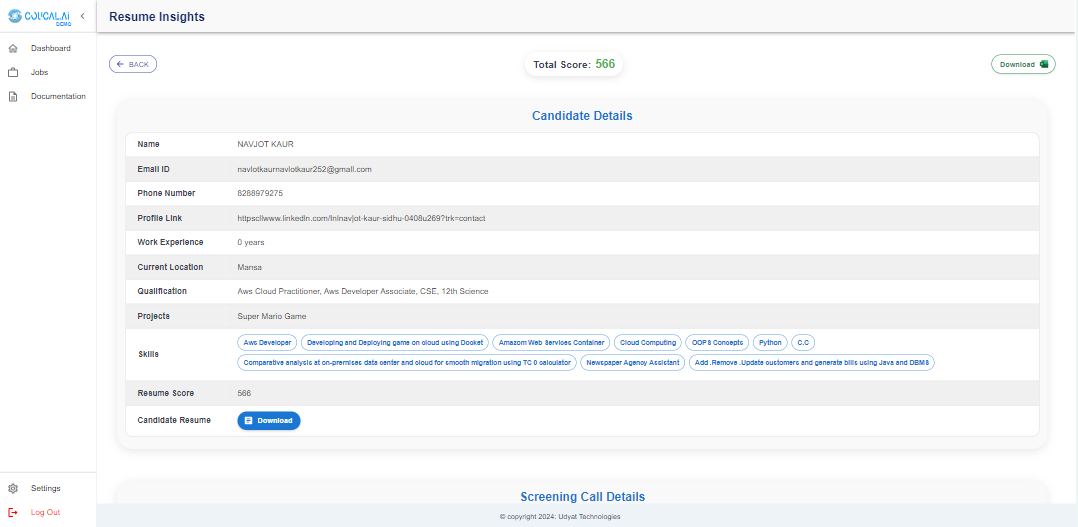
Resume Insights: Click on a particular resume to view detailed insights. You can also download the resume and any call recordings, providing you with comprehensive candidate profiles.
7. Close or Pause Jobs:
Once the recruitment process is complete or if you need to pause a job listing:Actions Button: In the dashboard, use the actions button to pause or delete job listings. This feature also allows you to view detailed job information and manage listings efficiently.
Conclusion
By following these steps, you can seamlessly navigate our product and optimize your hiring process. If you have any questions or need further assistance, our support team is always here to help. Happy recruiting!